Cuprotect® for roof shielding
Cuprotect®, Cuprotect®Spezial and Cuprotect®A1 |
|
No roof penetration with Cuprotect®A1 roof shieldingWe recommend to use Cuprotect®A1 because of its highest shielding effectivity and its thickness (corrosion protection). This type of installation is the most inexpensive shielding of a tiled roof with highest protection against electromagnetic waves. |
|
 |
 |
 |
 |
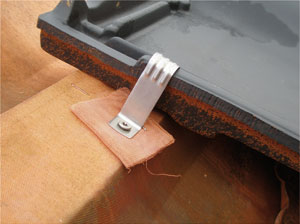
Storm bracket with underlay square |
Roof penetration, underlay square |
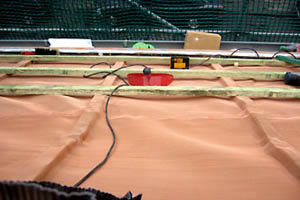
Roof shielding with Cuprotect®The Cuprotect® shielding mesh is fixed horizontally onto rafters with conductive copper or stainless steel staples. Battens and counterbattens are fixed with stainless steel screws. Wind braces must be electrically insulated from the Cuprotect® mesh at contact points (see arrow). In roof areas the connection between the sheets shall always be made with fell seams.
|
|
|
|
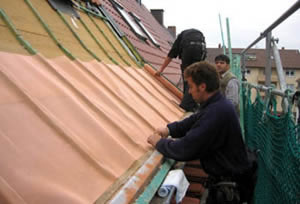
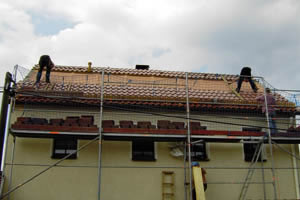
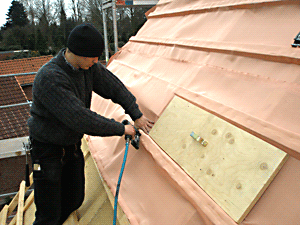
Applying Cuprotect® sheets externally onto roof (here between battens and counterbattens) |
Fixing Cuprotect® sheets by using a staple gun with conductive copper or stainless steel staples. Preparation of fell seam. |
|
|
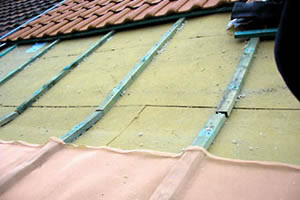
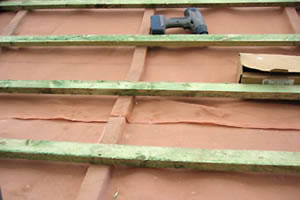
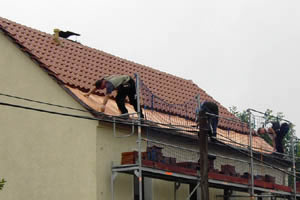
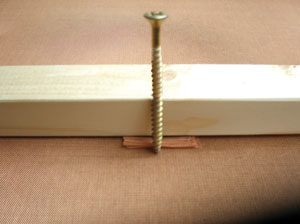
Finished fell seam (connection of adjoining sheets). Positioning of counterbattens for the roof tiles on top of the Cuprotect® Shielding. Mounting of counterbattens with four-ply pieces of Cuprotect® for a defined conductive connection of screw and Cuprotect® mesh. |
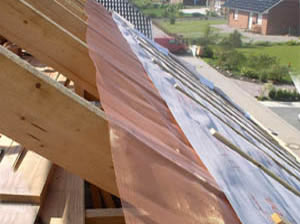
Installation of counterbattens for roof tiles on top of Cuprotect® layer viewed from above. |
 |
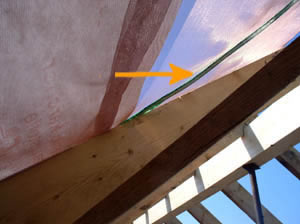 |
The Cuprotect® shielding mesh is fixed horizontally onto rafters. |
Wind braces must be electrically insulated from the Cuprotect® mesh at contact points (see arrow). |
|
|
Redevelopment of a flat roof with Cuprotect®
|
|
|
|
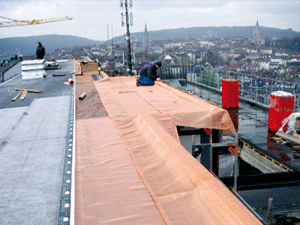
Shielding of the roof area from the outside. In the background a mobile communication mast is clearly visible. |
|
 |
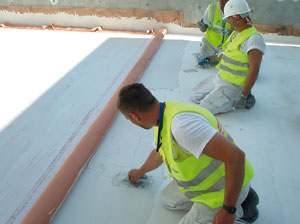 |
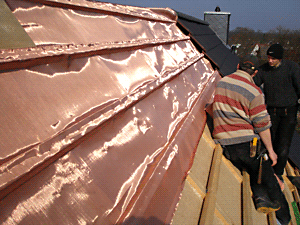
Making of the connection |
covering the sheets with plaster |
(see also Connection Techniques & Earthing)
|
|